Wednesday, January 20, 2010

The Bull S**t of the Strength and Conditioning Field


This article isn’t going to make me any friends, but hopefully it will open the eyes of some people and help them look outside their fields of thought and expand their thinking. During the last seventeen years, I’ve been exposed to several concepts and ideas as they pertain to strength and conditioning, including Olympic lifting, powerlifting, core training, assessment based training, Western periodization, Westside methods, tempo and volume based workout regimens, and others.

Here’s the big question I have—if all of these so called experts are correct, who is wrong? And if all of the others are wrong, who is right? It’s absolutely insane! Now, let’s look at a few training protocols to get an idea of what I’m talking about.


First, there are the assessment based programs. The people who swear by these programs are insane about assessing every area of the athlete. I’ve actually seen 100 item assessments for certain sports. While I agree that assessments are needed to address any imbalance or mobility issue an athlete might have, too many times these programs lack any type of real atmosphere. Westside Barbell Club possesses an atmosphere that can only be experienced at Westside. An athlete will get stronger just from breathing the air at Westside. That is the big secret of Westside or any other hard core facility that turns out champion after champion.


Then there is the Olympic lifting community who swears by the Olympic lifts and the amazing force generated by those lifts. Once again, I agree with a large part of Olympic lifting such as the athletic component, the mobility requirements, and the force produced. However, Olympic lifting isn’t very practical. In most high schools and colleges, the strength coach has about 50 minutes to an hour to train 20 to 30 athletes. It took Shane Hamman, the best heavy weight ever in America, over a month with a broomstick to become proficient with the lifts. The problem with Olympic lifts is that when they’re performed improperly, the risk of injury is increased significantly. Therefore, unless the coach can be assured that each and every athlete is properly supervised each session, the program isn’t practical or safe.


Next up is the powerlifting community. They train with mainly the squat, bench, and deadlift. All three are very important and fairly simple to teach, but they lack the athleticism and explosion of Olympic lifting, and they can cause or increase imbalances within the athlete. How many times will a linebacker be on his back pushing vertical with his arms like in the bench press? Hopefully, he won’t find himself on his back at all. The other flaw of powerlifting is that without proper assistance work the posterior chain isn’t worked nearly enough. Over time, the bench will be particularly damaging to the shoulders unless proper precautions are taken. In reality, the bench press could totally be eliminated and replaced with the military press and push presses, but much confidence comes with a 300- or 400-lb bench press. The positive attribute of powerlifting is that all three lifts develop some overall strength, and, if used properly, some major functional muscle can be added to the athlete.


What about training the “core?” This is probably the latest phenomena on the fitness scene. These gurus call it “core” or “functional” training. Let me start by saying that I use a lot of core and functional training in my methodology, but it just isn’t the staple of my training. Here’s one example to clarify exactly what I mean. In 1998, I had the chance to work closely with a self-proclaimed guru in Phoenix, Arizona. While there, I witnessed an ex-Olympic lifter turn “core” trainer squat 225 lbs standing on a physio ball. Right away, I was blown away, and I thought that this guy had gone on to become unbelievably strong with this type of training. However, I later found out that his max squat was still the same if not lower. This is the hypothesis that I came away with—a really strong athlete can “learn” the core exercises, but the “core” people can’t learn to squat 1000 lbs!


There are facilities that develop many strong guys such as at Juan Carlos Santana’s facility in Florida, but he uses a lot of big movements as well as core exercises. His intensity level matches or exceeds Louie’s at Westside as well. Research shows that core training definitely aids the athlete, but you have to define “core,” assess the person, know what sport or activity they’re involved with, and design the exercises around your findings. “Core” is every muscle that supports the spine and pelvis, so the abdominals are just the beginning. What about the multifidus, erector spinae, obliques, transverse spinalis, glutes, psoas, or even the serratus anterior? All these “gurus” should know their anatomy and then prescribe the workouts.

The big question then becomes what program works? The answer is all of them work. Of course, all athletes should be assessed for muscular balance like quad to hamstring ratio, hip flexor strength and length, hip mobility, shoulder mobility, posterior to anterior chain balance, and athletic capabilities (i.e. 40-yard dash, vertical leap, etc). At that point, mobility plans should be developed and muscular imbalances should be addressed. Olympic lifting should definitely be used based on three variables—the individual athlete’s ability to perform the lifts, the coach to athlete ratio, and the time available to coach the athletes on proper performance of the lifts. For example, if only one coach is available per 20 athletes for 45 minutes three times per week and most of the athletes are new to Olympic lifting, start with only the clean pull and snatch pull to develop the explosive components of the lifts.


With powerlifting, Westside Barbell Club has developed a very athletic approach to powerlifting. Squats performed dynamically along with deadlifts definitely increase the speed and velocity of the lifts, which equate much better to athletes. Their focus is on posterior chain work such as glute/ham raises, reverse hypers, and good mornings, which are much more important to an athlete than leg presses or leg extensions. The extra workouts can be used to develop general physical preparedness or simply explosion with plyometrics. Their templates seem to be the most practical, and all of the other programs can be implemented within the Westside system. The system itself was developed from eastern European Olympic lifting programs.


Here’s one more question—what about other forms of training like tire flips, functional training, and balance work? Once again, the answer is simply develop the program around the sport, the athlete, the time available, and the availability of the coaches. Athletes are being short changed on the workout programs because coaches are too small minded to look outside of their small boxes. In my opinion, coaches fail to open their minds for several reasons including fear of new ideas, laziness to implement new ideas, and the inability to grasp new ideas (not very smart). A strength coach simply needs to understand the basic concepts of program design and implement new ideas accordingly. The one “key” that none of these programs can lack is atmosphere. That is the one variable that can’t change! An athlete has to have it to thrive. Whether it is Carlos Santana or Westside Barbell, they’re going to get a little crazy. The athlete is going to get stronger because they and everyone around them is expected to get stronger! Period.


I hope that this article opens the eyes of some people. All of us are right, and all of us are wrong! As long as there’s an atmosphere of excellence in the facility, it’s the combination of all the new information out there in the strength and conditioning world that makes the perfect system. So go out there and learn about each other! Take what is good, leave what is bad, and develop the perfect plan for your athletes. They deserve it. They deserve for all of us to get over our pride and continue our search for knowledge.

Tuesday, January 19, 2010

Overhead Pressing


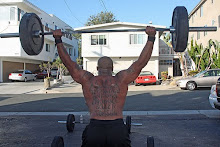
BARBELL SHOULDER PRESS/MILITARY PRESS

STARTING POSITION
The shoulder press, which requires a person to learn how to move their head around the bar, should be taught first to develop a movement pattern that will be needed to finish a push press. The most effective method to set up the shoulder press is to start with the bar resting on squat stands or power rack cradles at a height around the upper chest level. If a person is capable of obtaining a clean rack position, then use this to remove the bar from the stands. The bar should ideally rest across the upper pectorals, clavicles, and deltoids while being balanced by the hands. However, if a person cannot hold the bar across their anterior deltoids, they will need to hold the bar as close as possible to their chest while supporting the bar with flexed elbows and wrists or as much as flexibility will allow. Knees should be extended and torso straight.
ASCENT
There should be an inhalation to elevate the shoulders and chest prior to pressing the bar upward while extending the elbows and flexing the shoulders. Press the bar until the elbows are fully extended and the bar is directly over the shoulders. As the bar is being pressed, a person moves their head back around the bar. After the bar is above the head, the head should be pushed forward. The legs remain straight throughout the ascension of the bar until the elbows are at full extension.
DESCENT
Recovery from the fully pressed position is a controlled lowering of the bar with the arms until the bar reaches the anterior deltoids. Once the bar touches the shoulders, the legs may be used to further decelerate the weight of the bar but should not bend beyond a 1/4 squat position. The bar should be returned to the starting position using an explosive front squat action.
PUSH PRESS
The next lift in overhead pressing progression is the push press. It is similar to the shoulder press with the exception that the legs are used to help initiate the upward movement of the bar.
STARTING POSITION
The most efficient setup method is exactly the same as the shoulder press, where the lifter removes the bar from its resting location on squat stands or power rack cradles. It will be necessary for the athlete to use a clean grip and rack the bar across the anterior deltoids with the knees and torso straight
ASCENT (DIP AND DRIVE)
The athlete will contract their abdominal musculature prior to a forceful inhalation to elevate the shoulders and chest. Immediately after this raise of the shoulders, there should be a quick 1/4 to 1/5 squat, also called the dip, with a very rapid change in direction upward, generating vertical power drive. The bar will continue its upward motion from the continued application of force through the flexion of the elbow and shoulder. The push press is finished when the bar is pressed out with full elbow extension. The bar should be directly over the shoulders, with no re bending of the knees. During the upward movement of the bar, the person pushes their head through their arms until slightly forward of the arms. This forward motion of the head is achieved by thrusting the chin anteriorly as the bar clears the head while at the same time continuing shoulder flexion and moving the arms slightly posteriorly to place the bar directly over the shoulders.
DESCENT
Recovery from the fully pressed position is a controlled lowering of the bar with the arms until it reaches the upper chest and anterior deltoids. The knees bend to assist the decelerating of bar as it is received. The load on the barbell will typically be greater than the weight used for a shoulder press because of the use of the legs to initiate the action. This exercise is an explosive strength exercise as there is a component of speed associated with the generation of upward vertical displacement of the bar.
PUSH JERK/POWER JERK
STARTING POSITION
The push jerk or power jerk are names that have been used to describe the same exercise that is executed in the same manner as the push press with the exception during the pressing phase of the lift.
ASCENT (DIP AND DRIVE)
As an athlete explosively presses the barbell upward, they will simultaneously push themselves under the bar in a jump down motion. When the athlete's arms are straight (elbows at full extension and shoulders at full flexion) to catch the bar over head, the knees will be slightly flexed in a 1/4 squat position.
DESCENT
After the athlete catches the bar, they will stand up and demonstrate approximately about 2 seconds of control with the bar in the overhead position, then the bar is lowered back to the rack position across the anterior deltoids. It should be noted that with maximal attempts, bumper plates should be used so the athlete can use a control drop of the bar to the platform. Spotters on either side of the lifter can assist the athlete by grabbing the end of the bar when lowering the bar from the overhead position back to the rack position. If jerk boxes (stands) are used, then the bar is lowered to the boxes at the completion of the jerk in a controlled fall. Jerk boxes (stands) can be a 3-foot-long, 2-foot-wide wooden box or metal stand whose height can be adjusted according to the athlete.

SPLIT JERK
STARTING POSITION
The split jerk is a progression from the push jerk with the difference being that instead of pushing the body under the bar into the squat position, a split foot stance position will be used. Primarily, the split jerk is used for weightlifting, although the use of moving the feet in a cyclic split jump pattern may prove beneficial to triple jumpers, pitchers, and other sports requiring a similar lower extremity motion. A cyclic split jump is the motion of one leg moving forward while the opposing leg moving backward. A continual execution of these leg movements would result in the action of bounding. Therefore, inclusion of the split jerk may enhance the muscular stiffness of the legs, improving bounding efficiency. At this point in the pressing progression, the athlete should have the pressing phase well established. The next part in learning the push press is determining which foot will go forward and backward. The easiest way to determine the proper lead foot is to ask the athlete to walk toward you. Typically, the athlete will step first with the dominant leg, which would be the lead leg in the split jerk.
ASCENT (DIP AND DRIVE WITH SPLIT VARIATION)
The split motion is performed by a quick hip flexion of the lead leg and quick hip extension of the rear leg. The impact of both feet should occur at the same time with the front foot landing flat and the rear foot landing on the ball of the foot. Both knees should be slightly flexed and approximately hip width for maximal lateral stability. As in the jerk press, the legs will not only act as decelerators but will also have to be able to move quickly out of the way if a press is missed. The barbell should not move forward or backward but rather follow a strict vertical path .
DESCENT
Recovery from the split foot position is done by extending the front knee with a small step back followed by a step forward by the rear leg. If the steps by the feet are consistent, the athlete's feet should be close to parallel with each other when standing vertical. If the feet are not close to parallel, the coach should take some time to correct this error. The athlete or coach may choose to alternate the lead leg with repeated repetitions of the split jerk. This should be based on the overall goal of the athlete.

CONCLUSION
Overhead pressing motions are a vital component to a strength program for developing upper extremity strength and explosive pushing ability. However, these benefits can be negated if incorrect technique is taught, maintained, or promoted. There are a myriad of overhead pressing styles that can be implemented, but correct technique is just as critical for success as choosing the right exercise. It is the responsibility of the strength coach to select the most applicable press, specific to the athlete's goal. To effectively develop an athlete, there has to be the overall enhancement of strength and fitness before specific enhancement of attributes involved in that sport.

Sunday, January 17, 2010

Importance of Fast Twitch Capacity in Football Training

With the beginning of football season, the long anticipated excitement for the early powerhouse match ups has finally arrived. Coaches get their first look at new players, and fans can see what they can expect from their favorite teams. However, for some reason, many of the players that we were looking forward to watching are no longer on the field. Sadly, in recent years, what you can expect is a handful of injuries. More evident in pre-season camp and opening day, injuries due to a lack of preparation are seen in the countless non-contact ACL tears, Achilles tendon ruptures, and various strains, which are more prevalent now than ever. Let’s look at a very probable reason why.

Diagnosing football
A typical play lasts all of six seconds at most. In between, you have about 30 or more seconds to recover. This makes football a very atactic sport. Expanding on this system requires a higher fast twitch capacity. To build on an athlete’s capacity, you must induce an adaptation, which means high intensity loaded bouts of seven seconds or less with approximately 30 or so seconds to recover. You can build this by having your athletes perform repeated sprints until they’re unable to stay below the anaerobic threshold when recovering. Adaptation makes it necessary to increase the exercise intensity or duration needed for the saturation phenomenon. So eventually, your athletes should be around 40 or more sprints per session in around 50 minutes leading up to the season, not the typical 15–20 sprints or cross fields that most coaches consider substantial.

Missing the boat
Anymore, the majority of work we see year round is constant glycolytic energy systems development until the athletes can no longer move or they vomit. The major downfall to this is that you can expand on this capacity for only four weeks before it produces a diminished return. Yet, all we see in many programs and online videos is this push for high intensity “run till you can’t feel your legs” sort of conditioning. This sort of mentality is not only physically unrelated to the sport but mentally taxing as well. According to the research and the training residual of this energy system, the best time to train this capacity is the month leading into camp.Putting it to practiceWith building the capacity of the fast twitch fibers, you’re in fact increasing the oxidative potential. One thing you must avoid while improving the oxidative potential is efforts exceeding the anaerobic threshold. Highly intense glycolytic activity suppresses the oxidative process and activity of aerobic enzymes. Therefore, it’s important that heart rate monitors are used to ensure quality of the workout.

A few examples of workouts to expand fast twitch capacity are:
· Sled sprints with 10-lb plates for 30–40 yards until unable to remain under anaerobic threshold
· Hill sprints for 4–7 seconds until unable to remain under anaerobic threshold

Obviously, you don’t have to have the heart rate monitors to do this sort of conditioning, and this conditioning is much too important to skip. If you don’t have the benefit of heart rate monitors or anaerobic threshold testing, there are still great ways to induce the same training adaptation.

Here are a few examples:
· 7 on 7 for 30–45 minutes
· Sled drags/hill sprints—just run for time (4–7 seconds) and rest for approximately 30–40 seconds; gradually build from around 12–15 seconds until about 35–40 by the end of the off-season
· Weight vests sprints/position work for 20–30 yards with 30–40 seconds rest

Of course, look for signs of excessive fatigue, hyperventilation, flushed face, and profuse sweating, which are good indicators that the athletes have reached there anaerobic threshold.
There are certainly other ways to go about developing the energy system. But this all depends on whether or not you train individuals or teams. Individuals give you the opportunity to utilize the heart rate monitors and keep track of the time of each sprint. You may also have access to testing equipment to determine threshold levels, which allows you to know exactly how far you may push the athlete. However, if you’re training a team, time, organization, and resources are all factors. This is a great time to utilize the second group of exercise examples. With these protocols, you can easily keep track of the number of reps that your large groups do in a very controllable environment.

Remember that football isn’t a linear sport. These movements aren’t limited to straight ahead sprinting. Take advantage of versatile tools such as weight vests, which allow for freely moving tactical work.In summary, fatigue is the main contributor to injuries in most sports. When you’re tired, you overcompensate and your form is usually what goes first. So avoid the heavy breathing and playing your way into shape. Get your energy systems in line so you’re ready to dominate before the first snap!
  1. References
    Viru A (1995) Adaptation in Sports Training. Boca Raton, Florida: CRC Press.
    Zatsiorsky VM (1995)
  2. Science and Practice of Strength Training. Champaign, Illinois: Human Kinetics.

Saturday, January 16, 2010

Should I be squatting below parallel?


Going beyond parallel or going “rock bottom” is definitely optional. Getting to parallel is important, however. Fred “Dr. Squat” Hatfield writes, “You should learn how to go down into the squat position low enough. The top of your thighs should be about parallel to the floor or slightly lower, in a well-executed squat. Higher than that, and you’re losing some of the benefit to your quads.”There are no gender-based differences in optimal squatting depth, but there are anatomical differences from person to person: For example, long femurs can put greater stress on the knee joint while providing poor leverage, making it more difficult to do full squats. (When was the last time you saw a 6' 7" NBA star doing rock-bottom heavy squats?). Personally, I have very short thighs and I am completely comfortable squatting totally rock bottom, until my calves and hamstrings are touching.Going to parallel is the general recommendation, and your results will be fine just going to parallel. Parallel is defined as where the tops of your thighs are parallel to the floor. I believe I get better results (hypertrophy-wise) from breaking parallel, but that’s just my personal opinion.Being unable to reach parallel or just below parallel means that yes, you probably need to work on your flexibility. In particular, look at ankle/achilles flexibility. It’s not just quad, hamstring and hip flexibility you need to do a full parallel squat. In fact, the ankle is often where the problem often lies.In the meantime, as your flexibility gradually improves, what you can also do is experiment with stance width. If you lack ankle flexibility and lose your balance squatting narrow, a wider stance will help. Very narrow squats require very flexible joints; otherwise you must bend too far forward to maintain your center of gravity


Here’s another tip: Never take advice from anyone “more messed up than you are.” Everybody wants to be an expert these days, but I’d warn you to be cautious of friends, training partners or even personal trainers unless you know they are both a) qualified and b) walk the walk. Lots of people talk the talk, but very few walk the walk. Only take advice from people who walk the walk. If I wanted to take advice on squatting to help me gain lower body muscle mass, I’d ask Tom Platz. If I wanted to get advice on squatting to help me squat heavier weights, I’d ask Dr. Squat Fred Hatfield, Ed Coan or Louie Simmons.By the way, full (below parallel) barbell squats are completely safe when done properly. In fact, the National Strength and Conditioning Association (NSCA) released a position statement on this subject, called “The Squat Exercise in Athletic Conditioning.”


In a nutshell, here’s what it says:Correctly performed squats are not only safe, but they may actually PREVENT knee injuries The squat can enhance performance in many sports Overtraining and fatigue related injuries do occur with squats, but the chance of getting injured is reduced by following the established principles of resistance training program design. The squat is NOT detrimental to knee joint stability when performed correctly. Weight training exercises, including the squat, strengthen connective tissue, including muscles, bones, ligaments and tendons. There are different styles of squat performance and proper form requires the muscles to be conditioned for that form. Bouncing out of the bottom may help you get through the sticking point more easily, but this may be injurious to the knee. Squatting puts stress on the back, but injury potential is low if proper technique is observed. Reports of squat induced injuries are conflicting and inconclusive. Some may be based on biased samples. Other injuries may have been caused by other factors including improper technique, pre-existing injuries and structural abnormalities, other physical activities, fatigue or overtrainingThe bottom line is that parallel squats and or full squats are effective and safe when performed properly. Flexibility is required and form is everything. Your form must be impeccable. Most injuries come from poor form.


Proper form includes:Rigid torso Slow (controlled) descent Inhale on descent and hold breath momentarily until you reverse direction and are through the sticking point. Then take deep breath again before next rep. Concentrate on pushing with the quads Elbows should point to the floor or just slightly back, not rearwards You must be fully warmed up before attempting heavy weights Stretch lightly before squatting Develop sufficient abdominal strength Develop sufficient lower back strength Develop sufficient ankle, calf, quadricep, hamstring, and hip flexibility


Perfect your form before going heavy Do not become overly dependent on belts or wrapsKeep after it. NOTHING in the gym will give you a greater return for your efforts than free weight barbell squats – both for strength and physique. If you’re physically ABLE to squat, and you’re not squatting, then you’re only getting a fraction of the results you could be getting.

Friday, January 15, 2010

How to Set Up on the Deadlift


Most of the time, you’ll see the deadlift performed like a cat taking a shit. You know what I mean—the arch and twitch technique? There are a ton of reasons why someone would deadlift this way:
· Their form sucks.
· The weight is too heavy.
· Fatigue has set in.
· They aren’t flexible or mobile enough to set up according to their individual leverages.
· Their core strength sucks.
· They like cats.
It doesn’t matter what the reason is. The goal of any good training program that utilizes ground-based compound movements is to build strength and become more powerful. But this can’t be done at the risk of safety. You have to improve your technique, which will save your back in the long run and get you to your goals.
I had previously filmed a very popular shoulder rehab protocol and wanted to do the same for the deadlift because it’s notorious for bad technique. I’ve also received tons of emails asking me for help with deadlift form, so I wanted to break down the lift into simple, easy-to-apply steps that anyone can follow. Here are some simple, real world cues for setting up on the deadlift that can help you improve your technique.


The feet: Your feet should be placed approximately shoulder width apart, but it will be completely individualized. Even recently, just a small change in my own foot placement allowed me to keep more tension off the floor and get better leverage. Make sure your feet are flat and driving downward. If you drop your hips to pull and your ankles roll to the outside or the inside, something isn’t optimal. Change your shoes, change your foot placement, or maybe even improve your ankle mobility.


The shins: Your shins should start approximately 4–6 inches off the bar so that when you load into the bar, you can translate your shins and knees forward. This will allow your hips to drop into place and keep your lower back arched with appropriate tension. If you are too close to the bar, you’ll never be able to get the right line of pull or optimal leverage.
The grip: Your hands should be right outside your legs to minimize the hip angle and decrease the distance you have to pull. We always recommend pulling double overhand until your grip gives out. Then switch to a hook grip or even use straps. I usually don’t let my athletes pull with an alternated grip. Other deadlift grip considerations can be found at


The air: You must catch your air before the lift. This, along with a powerful isometric contraction of not only the abdominals but all of the muscles that surround the torso (anterior and posterior), will give you the tension to lift the weight with good form and protect the spine. With conventional deadlifts, I like to catch the air with the hips high before the drop so I can get the maximal amount of air in. Once the hips are dropped, you’re compressed (especially if you have a belt on), and you might be limited in your breathing.


The tension: Like previously stated, massive amounts of tension must be created not only across the quads, hamstrings, and glutes but also the grip and back. Remember, the more tension you can create, the stronger you’ll be and the more protected your spine and back will be. This tension allows your body to act as a single unit or one kinetic chain. One important tip for this cue is never forget the tension in the upper back. This is key to pulling it all together. You will immediately feel stronger if you can create tension across your back by squeezing the bar down and “flexing” the armpits, pulling the lats into the lift.


The pull: By driving your feet downward into the floor, the weight will begin its upward movement. Don’t allow your hips to rise too fast into a straight legged (stiff legged) position. As the bar hits the knees, a powerful glute contraction will lock you into a straight (line) torso position. This is a common error for most lifters who try and overpull after the bar crosses their knees and they move into hyperextension.


The return: Don’t lower the weight straight down. Instead, load the hamstrings and glutes with a Romanian deadlift movement back to the knees. Once it reaches the knees, move the bar straight downward back to the floor where you can stroke another rep immediately or come to a complete stop and reset completely before the next rep. The multiple rep technique where you touch the ground and go again should only be done if you’ve caught your air at lockout on the previous rep.

Thursday, January 14, 2010

Six Ways to Use Sandbags in Your Football Strength and Conditioning Program

Sandbags are an excellent way to transfer what you’ve gained in your strength program to the field. But many guys just aren’t sure how to use them. Here are six ways to easily implement sandbags into your football strength and conditioning program.

1. High rep conditioning work
Running, jogging, or pretending to jog as you shuffle your feet in a lame attempt to convince your coach that you’re running for distance has no place in your football conditioning program. Jogging is best left to the cross country runners and soccer players. You don’t jog on the field ever. So why do it in training?
Well for the most part, coaches who don’t understand how to train for football simply have you do the same things that their coaches made them do when they were young—jog, run laps, “road work,” or whatever lame term they come up with to describe go nowhere conditioning.
Sprinting is a much better option, but it can take its toll on your joints, especially pre- and in-season. Also, for most parts of the country, sprinting outside in the winter isn’t a smart idea. One slip on a patch of ice or packed snow and pop goes the ACL. Therefore, we have to look outside of the traditional “sprinting centric” conditioning. This is where sandbags come in—in a big way.
Using sandbag exercises for higher reps with minimal rest periods can build your base conditioning and, if applied in some of the ways I describe in the rest of the article, your football specific conditioning. Using sandbags for high reps gives you several advantages over using weights or sprint style conditioning for football.

ü They’re safer than weights for high rep work. If you have to dump a lift, you won’t get hurt.
ü They’re easier on your joints than sprinting. This is especially true for bigger players like linemen and linebackers.
ü They can give you sport-specific conditioning by simulating a live opponent (more on that in later).
To get started with high rep sandbag conditioning for football, stick with the basic moves.

Clean and jerk
Take a loaded bag from the ground to over your head in any way possible. This isn’t always as clean looking as a barbell clean and jerk, but it will train your body to work as a unit, even when tired. Try five sets of 20 reps. At first, don’t restrict your rest periods. Just take note of them. Work your way down to 45 seconds of rest. Then, when you hit that level, begin to add sets, reps, or weight.

Bear hug squat
Bear hug a heavy sandbag and squat with it held at chest level. Perform as many reps as you can in 20 seconds. Rest for 20 seconds and then go for another round of 20. Do this after your clean and jerks and start with seven sets, eventually working up to 10. When you can get 10 sets, add weight.

Just adding those two simple movements to your football conditioning program will produce phenomenal results. You can add them to the end of your leg training day or use them on their own as a conditioning day. You’ll notice that the entire session is fairly quick. Don’t let that fool you into thinking it’s easy. If it’s too easy, you’re kidding yourself. Add weight and get to work.

2. Preventing strength leakage
Using weight is the number one way to build your strength for football. Barbells, dumbbells, and kettlebells are the foundation of any good football training program. But they do have some limitations when used alone. Yes, they build tremendous strength, but they can leave small gaps between weight room strength and football strength. We call this strength leakage.
We’ve all seen the guy who can bench 400 lbs but can’t block the sun. This guy might even be a decent athlete, so why can’t he dominate on the field? He allowed himself to develop gaps in his strength so that he can’t take what he gained in the weight room to the field. He literally leaks strength from his joints or at his waist and can’t apply his power to an opponent.
Using sandbags, especially when doing cleans, clean and jerks, or any kind of squatting, teaches the body to transfer power from the ground up through the hips and mid-section. You also train the stabilizers, tendons, and ligaments because the bag changes shape on almost every rep. There’s no way to settle into a groove when lifting a sandbag. This is how they prevent leakage. They train you in odd positions and hit those stabilizers in a way that weights alone can’t do.
To ensure that you transfer your weight room gains to the field, sandbags are essential. Work those stabilizers in odd positions from varying angles with an implement that never stays the same shape twice. Sounds like a recipe for football success right there.

3. “Live opponent” work
Sandbags are alive. They move, change positions, and fight you every step of the way. Sounds a lot like a live opponent to me. Live opponent work ties in closely with the concept of strength leakage. Weights are fixed. They stay balanced, evenly distributed, and constant. This is good when it comes to building maximum strength, but it can hinder the transfer of power to taking on a live opponent. Wrestlers, fighters, and martial artists have used sandbags for centuries because of their effect on strength when fighting someone. Football is for the most part a three-hour fight. Every play you line up and fight your opponent. He will not stay in positions that allow you to block or tackle him. No, he wants to make your job as hard as possible.
Your football training should reflect this. Sandbags change shape and force you into positions that would be impossible (and even dangerous) to get into with a barbell. Think about tackling a big fullback. You have to drop really low while still maintaining a power position in the hips and legs. Now you have to spring forward, hit, wrap the arms, and drive your legs to bring the big ox down.

4. Linemen-specific positions
Linemen and linebackers might benefit the most from using sandbags, at least in terms of finding football-specific movements. Linemen, both offensive and defensive, have to be able to keep a low center of gravity and move themselves and their opponent in the direction they want. The linemen’s ability to control their opponents is almost always the difference maker in any game. I don’t care how fast your “skill” guys are. If the line can’t block, they aren’t going anywhere.
Here are a few linemen-specific sandbag exercises.

Bear hug and duck walk
The sandbag bear hug is definitely old school. It’s also widely practiced because of the great training effects on the back, legs, pecs, and grip. While it’s a good exercise, we’re always looking for something more. That’s what this sport is all about—always striving for more.
I noticed that many linemen, backs, and linebackers could keep a good football position when in a T-shirt and shorts, but once the pads, helmet, and a live opponent were thrown in, they began to lean forward, get into a bad position, and get beat. Seeing a strong, 275-lb linemen thrown to the ground because he was leaning forward isn’t pretty.
To prevent this, we do a sandbag bear hug and duck walk combination. This is an excellent football training movement that will strengthen the back, legs, and entire upper body for many football-specific tasks (tackling, blocking, pre-jump position). The only difference we make from the standard bear hug is that instead of wrapping our arms around the bag like Ken Patera would, we grab the bag by the handles and hold it close.
From this position, you start duck walking. Shoot for three sets of 10 yards to start and gradually increase the sets to six. Keep your back extremely tight, sit back, and don’t lean forward. If I catch any of you leaning forward during this, I’ll personally throw you down.

Clean and push
This is a cool variation of the clean and press that is perfect for football training because it’s highly specific, especially for linemen. It will require great let strength, transfer of power from the legs through the hips and to the upper body, and muscular coordination. And all you need is a sandbag and a little bit of room.
Load a bag and clean it in any way you see fit. Use the various handles or mixed grips or just grab the bag itself. Now clean it to chest height. When I say clean it, I don’t mean end up in one of those “split the legs eight feet apart” kind of clean positions. No. I mean finish the clean in the good football position just as you would pre-block, tackle, jump, and sprint.
For the first few reps, hold that position. Then pop the hips hard and push the bag as far as you can. Think if it like a standing bench press. It’s the exact motion used when blocking, making it an excellent movement for linemen. It’s maybe one of the most football-specific training exercises in the world. After you get the motion down, begin to do the entire movement as one complete exercise rather than pausing with the bag at chest height before pushing. This is an ideal time to video the lift or have a coach/teammate watch you and critique your form. There aren’t many guarantees in football or football training, but I can damn near guarantee that this exercise will improve your blocking and tackling. Use this exercise for conditioning, as a finisher, or as a total body accessory lift. Vary the sets and reps from high to low with appropriate changes in the weight of the bag. Both linemen and linebackers can vary either exercise by moving sideways during the movement. Don’t forget that we need as much, if not more, lateral strength than we do straight ahead speed.

5. Leg exercises
I don’t want all the talk about high rep conditioning and odd position work to leave you thinking that sandbags are only good for specialty work. In fact, quite the opposite is true. You can use sandbags as a great alternative to barbells for strength work in the lower body.
Zercher Romanian deadlifts with chains or bands added My athletes are sick of hearing this, but most football training programs don’t put enough emphasis on working the hamstrings. Sure, the posterior chain training has gained popularity, but most assume that a few sets of leg curls and some standard deadlifts are sufficient to make the hamstrings and glutes strong enough to make you faster. The truth is that the hamstrings have an amazingly high work capacity. Exercises like deadlift variations, squats, and even leg curls are needed, as the hamstrings must be worked in both of their functions (flexion and extension). Zercher Romanian deadlifts are a great way to hammer the hamstrings. However, doing these with a bar can be painful, especially when you start using big weight. Using a sandbag is less painful yet harder. Always a good combination. The only problem is if you’re a bigger athlete or you’re using heavy sandbags, it can become difficult to effectively hold the bag in the Zercher position. By adding chains or bands, you can use a smaller sized bag but work the legs and back even harder. Plus, any time you use chains and/or bands, you’re using accommodating resistance, and this is always good for athletes (teaches acceleration).
You can use this as an in the weight room hamstring training exercise performed after your main exercise for the day. Go with a 3–5 sets of 4–8 reps.

6. Build huge arms and a powerful grip
Don’t let any of the strict coaches out there fool you. Arm training is almost as important as working the posterior chain when it comes to training for football. No, arm work won’t directly increase performance. But—and this is one huge but—the way a player feels when he puts that uniform on can take a marginal player and turn him into a stud because of the increased confidence. Football players spend tons of money every season on duct tape, pins, glues, and elastic in order to roll their jersey sleeves up as high as possible, thus giving the fans the added bonus of viewing the gun show. There’s not a player in the world who doesn’t care if he has big arms. So rather than fight it, let’s use it to our advantage. Weights and dumbbells should make up the bulk of your arm training, but if you want to really go from average to extraordinary, you should seriously consider adding sandbags to your arm training. Simply grabbing the bag will activate the biceps and forearms to a much higher degree than weights alone. Many guys neglect forearm and grip training so they can focus more on the biceps. However, if your biceps progress much faster than the forearms, your progress will stall. The body will inhibit your upper arms from going much farther for fear of injury. Plus, we all know there are times when a strong grip will pay off in a game (carrying the ball, holding an opponent, etc).

Sandbag curls
These are an excellent way to work the forearms and biceps hard. Load up a bag and grab it any way you can with palms facing upward or toward each other. Now curl the bag. It won’t be a pure curl like when using a barbell, but that’s part of the point. Your hands and forearms will become extremely sore when doing sandbag curls so don’t go crazy at first. Go with a traditional 3 X 8 to start and add weight slowly. You can also do sandbag reverse curls by grabbing the bag with your palms facing down.


Steven Morris is a personal trainer and strength coach in the Philadelphia and South Jersey areas and the owner of Explosive Football Training. He has been lifting weights for over 15 years and has been helping people achieve their fitness and strength goals for over a decade. Learn more about his methods and services at www.explosivefootballtraining.com.

Wednesday, January 13, 2010

Women Athletes and ACL injuries...


In 1998, the American Journal of Sports Medicine featured an article titled, “The Association Between the Menstrual Cycle and Anterior Cruciate Ligament Injuries in Female Athletes.” This article confirmed the suspicion that many coaches already had, which is that hormonal as well as anatomical predispositions were to blame for the seeming epidemic of female athlete ACL tears. I’ve come to the conclusion that there are three major reasons why women are more than four times more likely than men to tear their ACL’s playing sports (1).


In order to make hypotheses about women’s increased susceptibility to ACL tears, one must first understand the basic anatomy of the knee and the purpose of the ACL. First, the knee is a joint comprised of four bones—the femur, the tibia, the fibula, and the patella. The knee joint is padded by sections of cartilage (menisci) on both the medial and lateral side. The ACL is one of four major ligaments responsible for stability in the knee. The ACL originates in the notch of the distal portion of the femur and inserts into the tibia. Due to its origin and insertion, its primary purpose is to protect the knee from too much anterior translation of the tibia.


The first portion of the hypothesis we will discuss is the hormonal reason for women’s increased susceptibility to ACL tears. Dr. Kurt Spindle, an orthopedic surgeon in Nashville, has done some of the most relevant research on this portion of the female athlete’s epidemic. In his study, he discovered that women were three times more likely to tear the ACL when they were having their period. He explains this by stating that during a female’s period, the luteinizing and follicle stimulating hormones are allowed to enter the bloodstream. These hormones come into contact with the ACL’s recently discovered active hormone receptors. It is believed that this spike in hormonal levels can actually temporarily alter the composition of the ligament, therefore leaving the ACL more prone to tearing. Dr. Spindle also cited that women who had been taking oral contraceptives were less likely to tear their ACL. This is due to the fact that oral contraceptives skyrocket estrogen and progesterone levels, causing luteinizing and follicle stimulating hormones to not be released.


The second reason female athletes are at least four times as likely to tear their ACL is because of the difference in the anatomy of the hip. The term “q-angle” is defined as “a measurement of the angle between the quadriceps (rectus femoris is usually used) and the patella tendon (3).” Q-angles in women are generally at least five degrees larger than that in men, which causes an increased tension on almost all of the ligaments of the hip and knee. The hip structure that most women have is great for giving birth but not so great for playing sports requiring lots of multidirectional movement.


The third reason for female ACL tears is an anatomical predisposition. The intercondyler notch is a portion of the knee between the condyles that the ACL glides through during extension and flexion of the knee. These condyles are two rounded portions, one on each side of the notch. They provide a large source of stabilization for the knee. Think of the condyles as your knuckles when you put two fists (femur and tibia) together. One of the main purposes of the condyles is to give the ACL additional support by preventing too much anterior movement of the tibia. Women have smaller condyles (less knee stability) as well as a smaller intercondyler notch. The fact that women typically have smaller condyles is a distinct mechanical disadvantage that leaves women with less knee stability in general. Additionally, the smaller intercondyler notch that women have can lead to the ACL being pinched or torn inside the joint. So there are a host of anatomical differences in the knee joint of women that leave them more susceptible to ACL tears.

So what’s a girl to do? Should girls with wide hips avoid playing sports requiring multidirectional movements? Should girls sit out from playing sports when they’re having their period? Should collegiate athletic programs require their female athletes to be on oral contraceptives to lower their chances of season or career ending ACL tears? There are obvious legal and moral issues involved with asking female athletes to take oral contraceptives, but it’s an option I wouldn’t be surprised to see explored. However, my answer to this question is a resounding no. A study done by the American Journal of Sports Medicine declared that women who undergo lower extremities injury prevention workouts are 62 percent less likely to suffer traumatic knee injuries (5). This tells us that corrective/preventative exercises are definitely the way to go.
All three factors related to women’s relative knee instability are intertwined with the fact that women typically have roughly 30 percent less muscle mass than men. Muscle mass is one of the joints’ greatest stabilizers. There is a stigma in the exercise science field about training for larger muscles, but this stigma is largely unfounded. There is a belief that flexibility and muscle mass are mutually exclusive qualities. This isn’t true. Gratuitous amounts of muscle mass and flexibility, however, are mutually exclusive.


Flexibility is defined as “the ability of your joints to move throughout a full range of motion” (6). It’s discussed a lot in the athletic performance field, but sometimes we forget that being super flexible isn’t always good. Being too flexible can lead to joint instability because of the joints’ extremely large range of motion. This is why training for hypertrophy and balanced muscle ratios is so important. By training to achieve a proper quadriceps to hamstring strength ratio, female athletes can drastically decrease the likelihood of ACL tears (4). Most females, just like their male counterparts, are quadriceps dominant. Having strong quadriceps is great, but the hamstring complex by virtue of its origin and its insertion helps to prevent too much anterior translation of the tibia from occurring. This anterior translation of the tibia is the reason most tears of the ACL occur. This is why training your posterior kinetic chain, specifically your hamstrings, is so important.


Additional forms of corrective exercises should include multidirectional neural activation/enhancement drills. The quicker that muscles fire while an athlete is making a cut, the quicker the joint will be stabilized. Oftentimes ACL tears occur when an athlete plants a foot to cut and immediately the plant leg is compromised by a collision. It isn’t speculation to say that if surrounding musculature can fire quicker and stronger (more fibers), these plant and twist tears would become less likely.


In conclusion, it’s an undeniable fact that female athletes are up to four times more susceptible to ACL tears than their male counterparts. There are at least three scientifically proved reasons for this and perhaps more that we haven’t discovered. However, there is hope for the female athlete. There is a vaccine available to aid in putting an end to the “female athlete’s epidemic.” Through the combination of preventative exercises aimed at producing neural adaptation and balanced hypertrophy, there can be more healthy knees out there on the field of play.


1. Wojtys EM, Huston LJ, Lindenfeld TN, Hewett TE, Greenfield ML (1998) “Association between the menstrual cycle and anterior cruciate ligament injuries in female athletes.” The American Journal of Sports Medicine 26(5):614–19.
2. Spindler K (2002) “The Effect of the Menstrual Cycle on Anterior Cruciate Ligament Injuries in Women as Determined by Hormone Levels.” American Journal of Sports Medicine 30(2):182–88.
3. “The Q Angle.” The Virtual Sports Injury Clinic—Sports Injuries. Accessed: Nov. 12, 2009. At: http://www.sportsinjuryclinic.net/cybertherapist/front/knee/q-angle.php.
4. Pettineo, et. al. Female ACL Injury Prevention With a Functional Integration Exercise Model. Strength and Conditioning Journal 26(1):28–33.
5. Joseph M (2008) Knee Valgus During Drop Jumps in National Collegiate Athletic Association Division I Female Athletes: The Effect of a Medial Post. American Journal of Sports Medicine 36(2):285–89.
6. Marieb EN. (2008) Essentials of Human Anatomy & Physiology (9th Edition) (Essentials of Human Anatomy & Physiology (Marieb)). San Francisco: Benjamin Cummings.